Cài đặt NextCloud (Apache + PostgreSQL + PHP8.1) trên Ubuntu 22.04
NextCloud là gì?
Nextcloud là một phần mềm (Mã nguồn mở) miễn phí giống như Dropbox, Google Drive, một nhánh của dự án ownCloud. Nextcloud được viết bằng PHP và JavaScript, nó hỗ trợ nhiều hệ thống cơ sở dữ liệu như MySQL / MariaDB, PostgreSQL, Oracle Database và SQLite. Để giữ cho các tệp của bạn được đồng bộ hóa giữa Máy tính để bàn và máy chủ của riêng bạn, Nextcloud cung cấp các ứng dụng cho máy tính để bàn Windows, Linux và Mac và một ứng dụng di động cho Android và iOS. Nextcloud không chỉ là một bản sao dropbox, nó cung cấp các tính năng bổ sung như Lịch, Danh bạ, Lên lịch tác vụ và phát trực tuyến phương tiện với Ampache.
Cài đặt NextCloud trên Ubuntu 22.04
Chuẩn bị:
- Máy chủ sử dụng Ubuntu 20.04 (Tham khảo các dịch vụ VPS tốt nhất tại đây)
- RAM: 1GB (Tối thiểu, nhưng để hoạt động tốt hơn bạn nên dùng VPS có cấu hình RAM cao)
- CPU: 1Core
- Disk: 20GB
Bước 1: Download NextCloud trên Ubuntu 22.04
Đầu tiên các bạn hãy SSH vào máy chủ Ubuntu 22.04 của mình, tiếp đó bạn hãy Download NextCloud từ kho lưu trữ về máy chủ của mình. Tại thời điểm mình viết bài này thì phiên bản mới nhất của NextCloud là 24.0.0, các bạn có thể truy cập trang chủ theo liên kết https://nextcloud.com/install/ , vào phần DOWNLOAD SERVER >> ARCHIVE FILE để xem và Download bản mới nhất.
- Để Download nhanh chóng, tại máy chủ của mình các bạn hãy copy và chạy lệnh bên dưới:
wget https://download.nextcloud.com/server/releases/nextcloud-24.0.0.zip
Lưu ý: Nếu bạn muốn sử dụng phiên bản Nextcloud khác, bạn chỉ cần thay thế 24.0.0 bằng phiên bản mà bạn cần.
- Cài đặt unzip để giải nén file
sudo apt install unzip
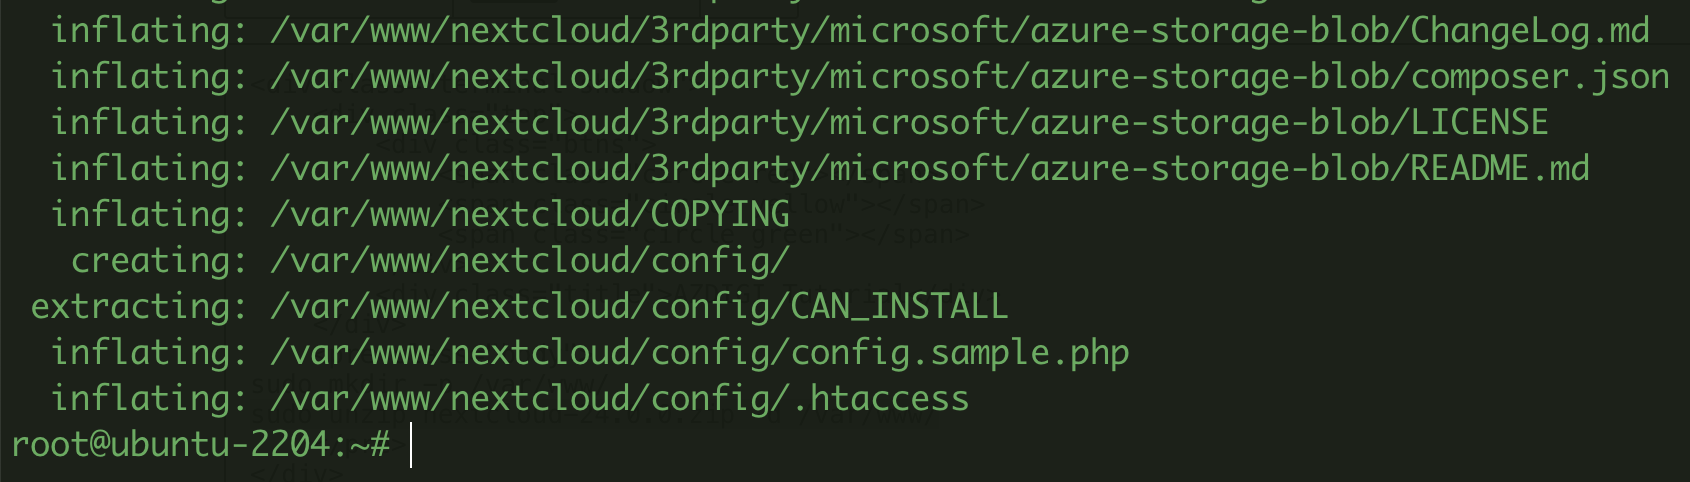
- Tạo thư mục /var/www/ và giải nén File vào đường dẫn này.
sudo mkdir -p /var/www/
sudo unzip nextcloud-24.0.0.zip -d /var/www/
- Set lại owner cho thư mục thành www-data
sudo chown www-data:www-data /var/www/nextcloud/ -R
Bước 2: Cài đặt PostgreSQL và tạo cơ sở dữ liệu cho Nextcloud
Nextcloud tương thích với PostgreSQL , MariaDB / MySQL và SQLite, tuy nhiên nếu hoạt động trên PostgreSQL thì Nextcloud sẽ có hiệu xuất nhanh và ổn định hơn nhiều, do đó mình sẽ cài đặt Nextcloud với PostgreSQL.
- Cài đặt PostgreSQL
echo "deb [arch=amd64] http://apt.postgresql.org/pub/repos/apt/ `lsb_release -cs`-pgdg main" |sudo tee /etc/apt/sources.list.d/pgdg.list
wget --quiet -O - https://www.postgresql.org/media/keys/ACCC4CF8.asc | apt-key add -
sudo apt update
sudo apt install -y postgresql-14 postgresql-client-14
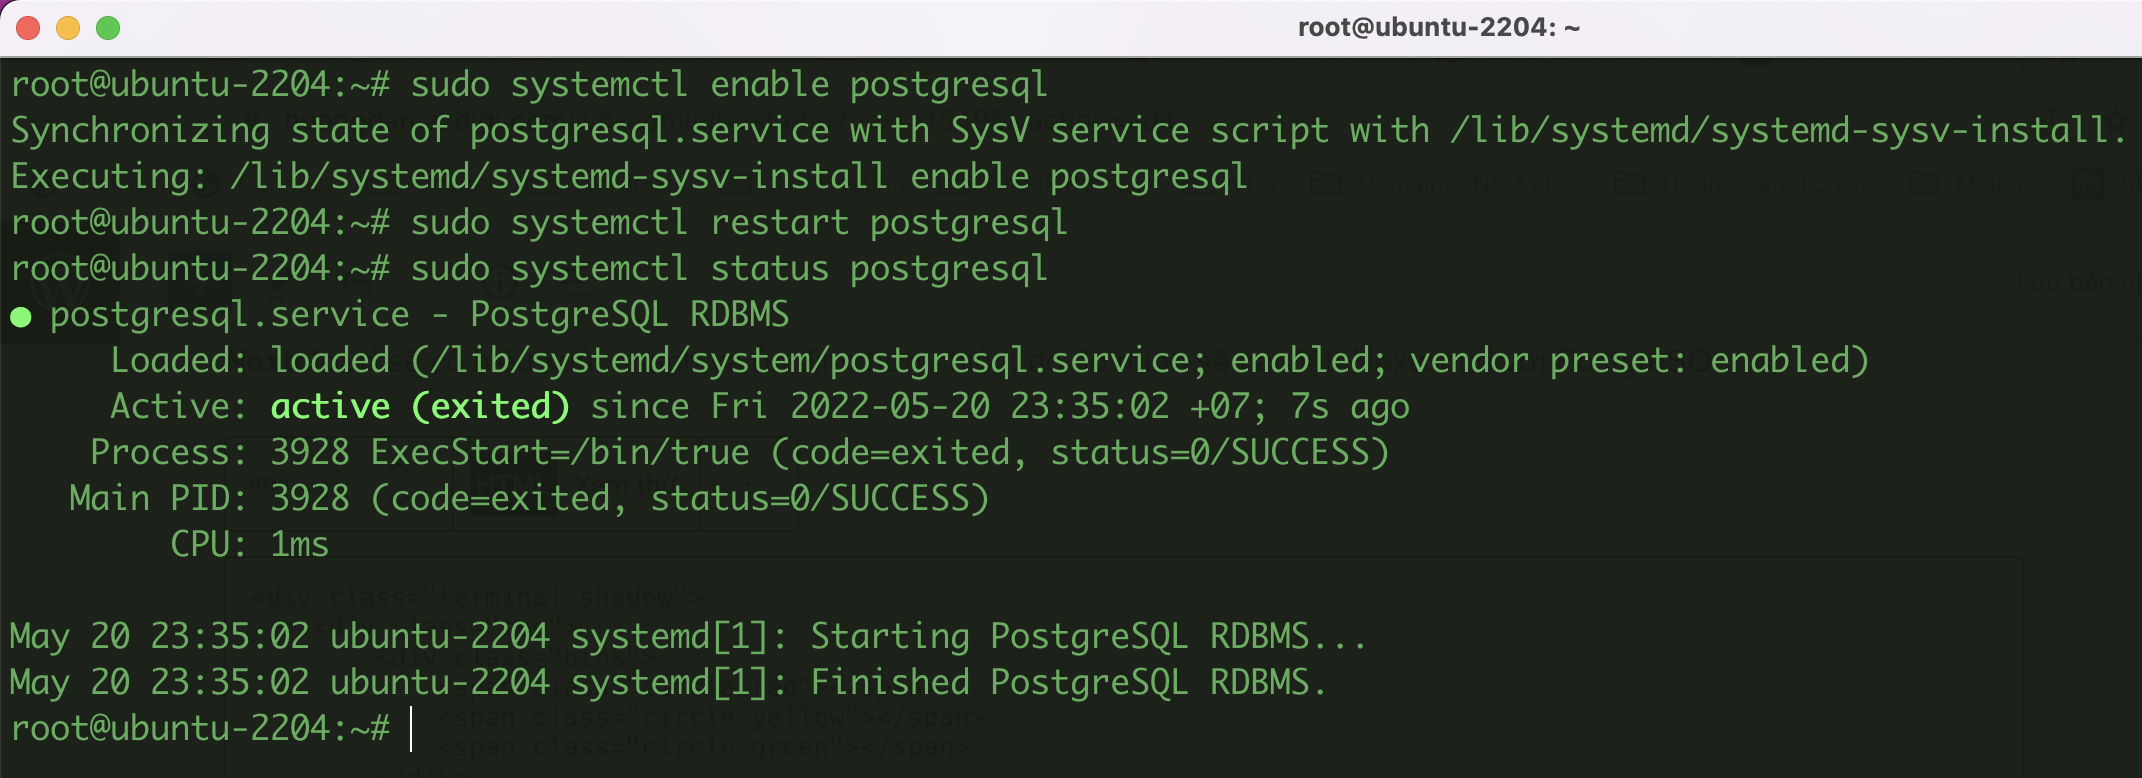
sudo systemctl enable postgresql
sudo systemctl restart postgresql
sudo systemctl status postgresql
- Đăng nhập vào PostgreSQL với người dùng postgres
sudo -u postgres psql
- Tạo cơ sở dữ liệu với tên nextcloud
CREATE DATABASE nextcloud TEMPLATE template0 ENCODING 'UNICODE';
- Tạo user tên nextclouduser và đặt mật khẩu
CREATE USER nextclouduser WITH PASSWORD 'nextclouduser_password';
- Cấp quyền sử dụng cở sở dữ liệu cho user
ALTER DATABASE nextcloud OWNER TO nextclouduser;
GRANT ALL PRIVILEGES ON DATABASE nextcloud TO nextclouduser;

Bây giờ bạn nhấn Ctrl+D để thoát khỏi giao diện PostgreSQL.
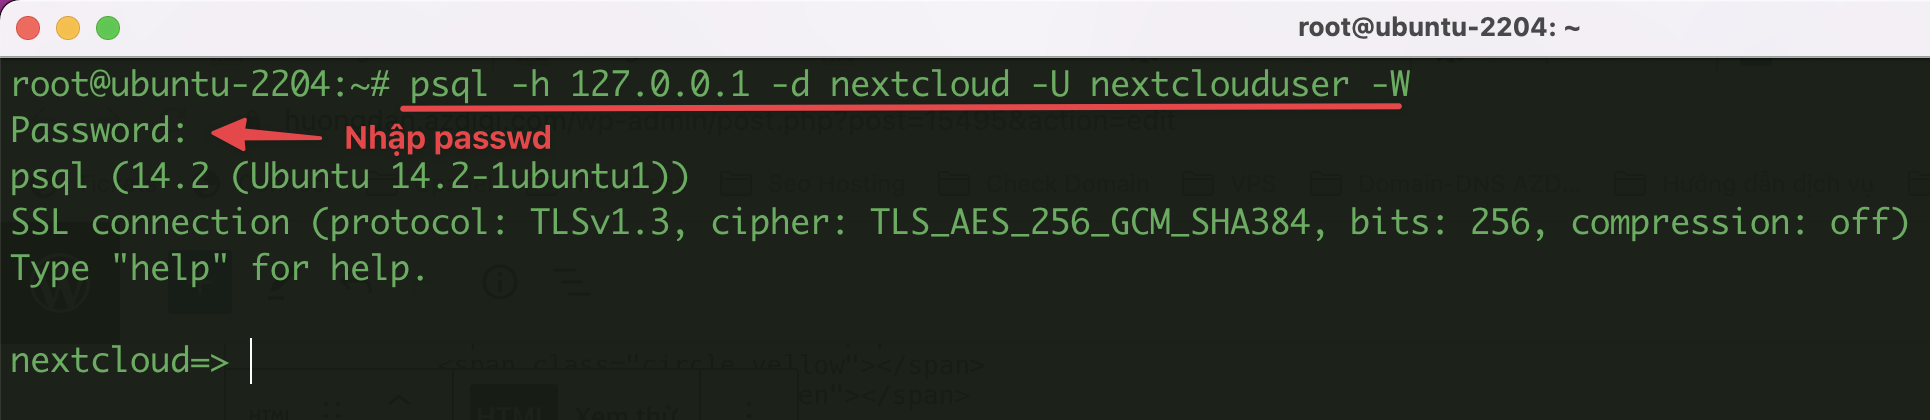
- Để đăng nhập vào PostgreSQL với user nextclouduser vừa tạo, bạn sử dụng lệnh bên dưới
psql -h 127.0.0.1 -d nextcloud -U nextclouduser -W
Bây giờ bạn nhấn Ctrl+D để thoát khỏi giao diện PostgreSQL.
Bước 3: Cài đặt Apache và cấu hình Virtual Host cho Nextcloud
- Cài đặt Apache
sudo apt install -y apache2 apache2-utils
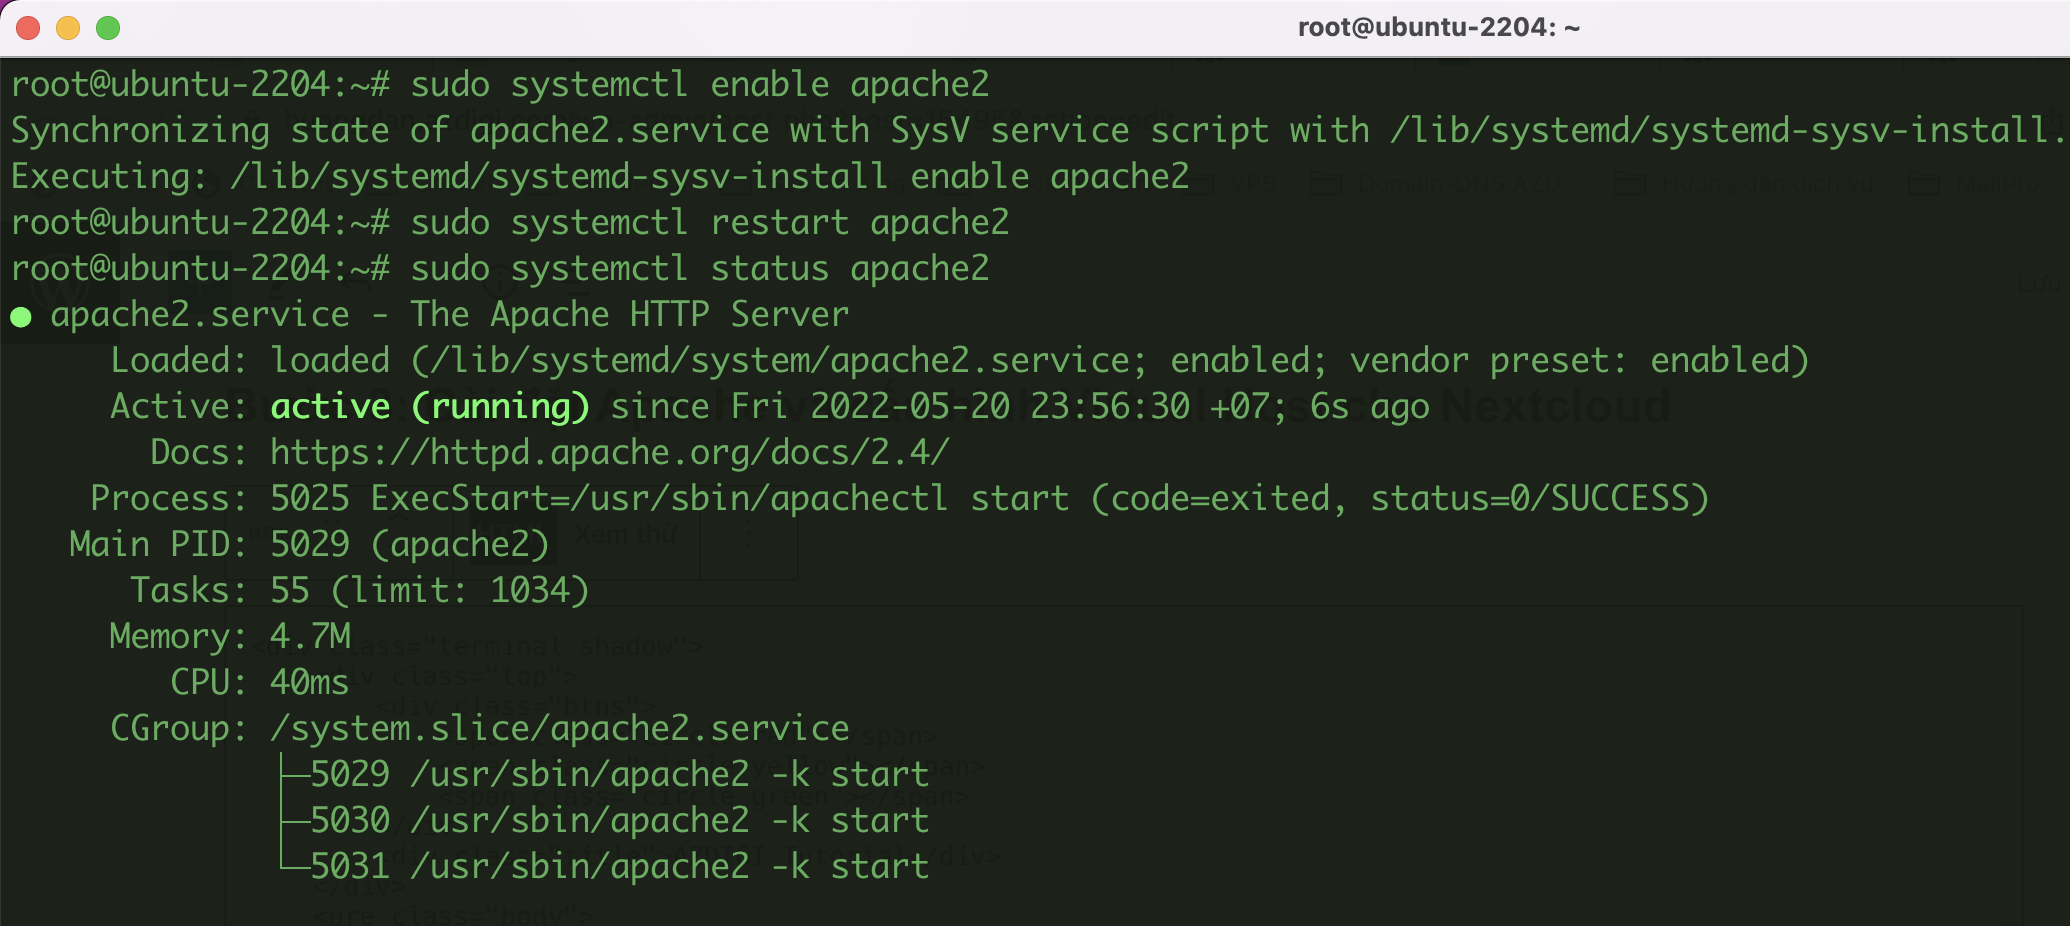
sudo systemctl enable apache2
sudo systemctl restart apache2
sudo systemctl status apache2
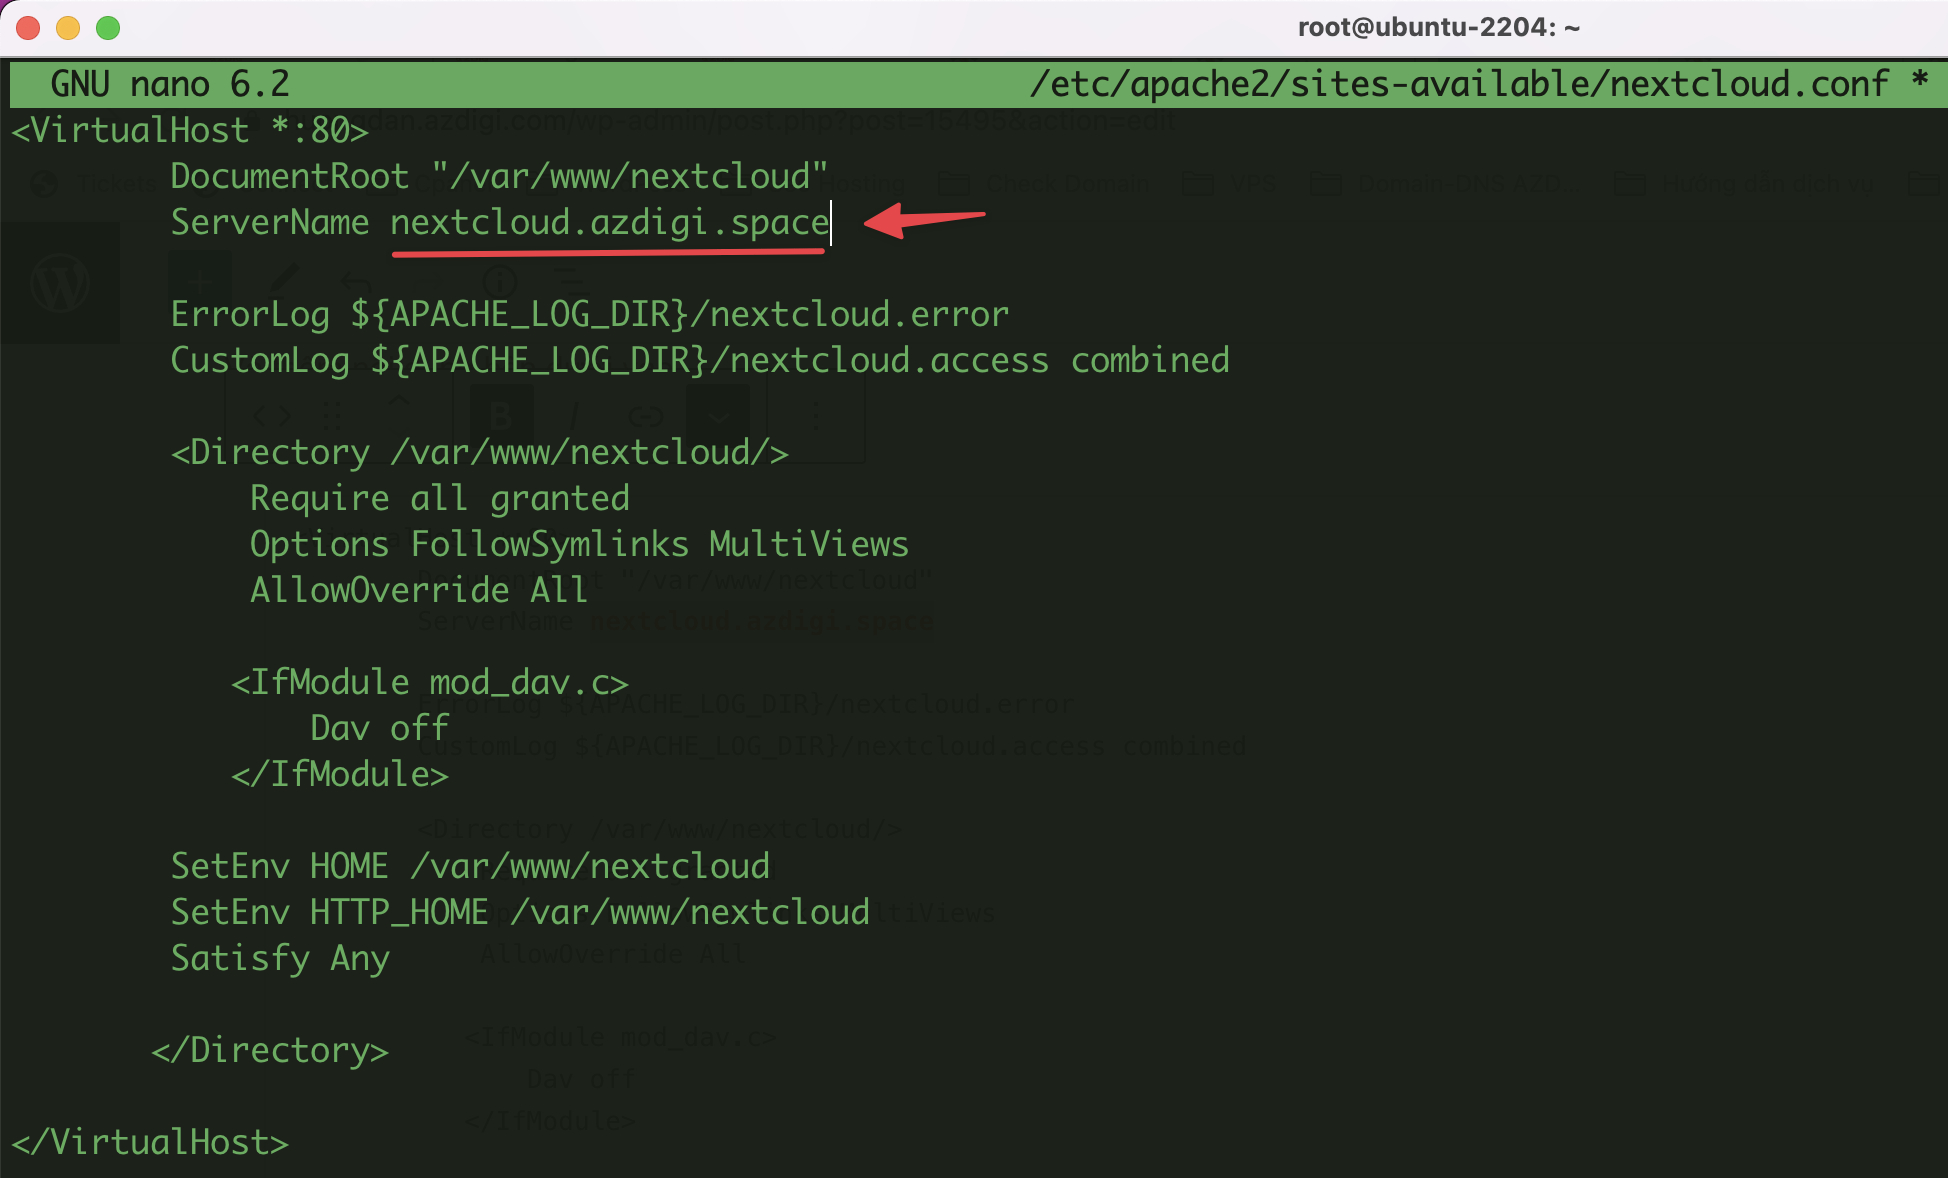
- Tạo file nextcloud.conf trong thư mục /etc/apache2/sites-available/
sudo nano /etc/apache2/sites-available/nextcloud.conf
Và thêm nội dung bên dưới vào và save lại.
<VirtualHost *:80>
        DocumentRoot "/var/www/nextcloud"
        ServerName nextcloud.azdigi.space

        ErrorLog ${APACHE_LOG_DIR}/nextcloud.error
        CustomLog ${APACHE_LOG_DIR}/nextcloud.access combined

        <Directory /var/www/nextcloud/>
            Require all granted
            Options FollowSymlinks MultiViews
            AllowOverride All

           <IfModule mod_dav.c>
               Dav off
           </IfModule>

        SetEnv HOME /var/www/nextcloud
        SetEnv HTTP_HOME /var/www/nextcloud
        Satisfy Any

       </Directory>

</VirtualHost>
Lưu ý: Thay thế nextcloud.azdigi.space bằng tên miền mà bạn muốn sử dụng để truy cập vào Nextcloud
- Kích hoạt virtual host vừa tạo
sudo a2ensite nextcloud.conf
- Bật các modules cần thiết của Apache
sudo a2enmod rewrite headers env dir mime setenvif ssl
- Kiểm tra cấu hình và khởi động lại Apache
sudo apache2ctl -t
sudo systemctl restart apache2
Bước 4: Cài đặt PHP và kích hoạt các Modules PHP
- Cài đặt PHP và các Modules PHP được NextCloud đề xuất
sudo apt install -y imagemagick php-imagick php8.1-common php8.1-pgsql php8.1-fpm php8.1-gd php8.1-curl php8.1-imagick php8.1-zip php8.1-xml php8.1-mbstring php8.1-bz2 php8.1-intl php8.1-bcmath php8.1-gmp
- Kích hoạt các modules và php8.1-fpm
a2enmod proxy_fcgi setenvif mpm_event rewrite headers env dir mime ssl http2
a2enconf php8.1-fpm
- Tùy chỉnh cấu hình apache2.conf để cho phép sử dụng .htaccess
sudo nano /etc/apache2/apache2.conf
Tìm và sửa lại giá trị
<Directory /var/www/>
Options Indexes FollowSymLinks
AllowOverride None
Require all granted
</Directory>

Thành


<Directory /var/www/>
Options Indexes FollowSymLinks
AllowOverride All
Require all granted
</Directory>
- Bật sử dụng HTTP/2 thì bạn thêm dòng bên dưới vào file apache2.conf
Protocols h2 h2c http/1.1
- Chỉnh sửa file php.ini
sudo nano /etc/php/8.1/fpm/php.ini
Điểu chỉnh các thông số bên dưới
opcache.enable = 1
opcache.enable_cli = 1
opcache.interned_strings_buffer = 8
opcache.max_accelerated_files = 10000
opcache.memory_consumption = 128
opcache.save_comments = 1
opcache.revalidate_freq = 1

max_execution_time = 300
max_input_time = 600
memory_limit = 512M
upload_max_filesize = 10240M- Khởi động lại Apache và php8.1-fpm
sudo systemctl restart apache2 php8.1-fpm
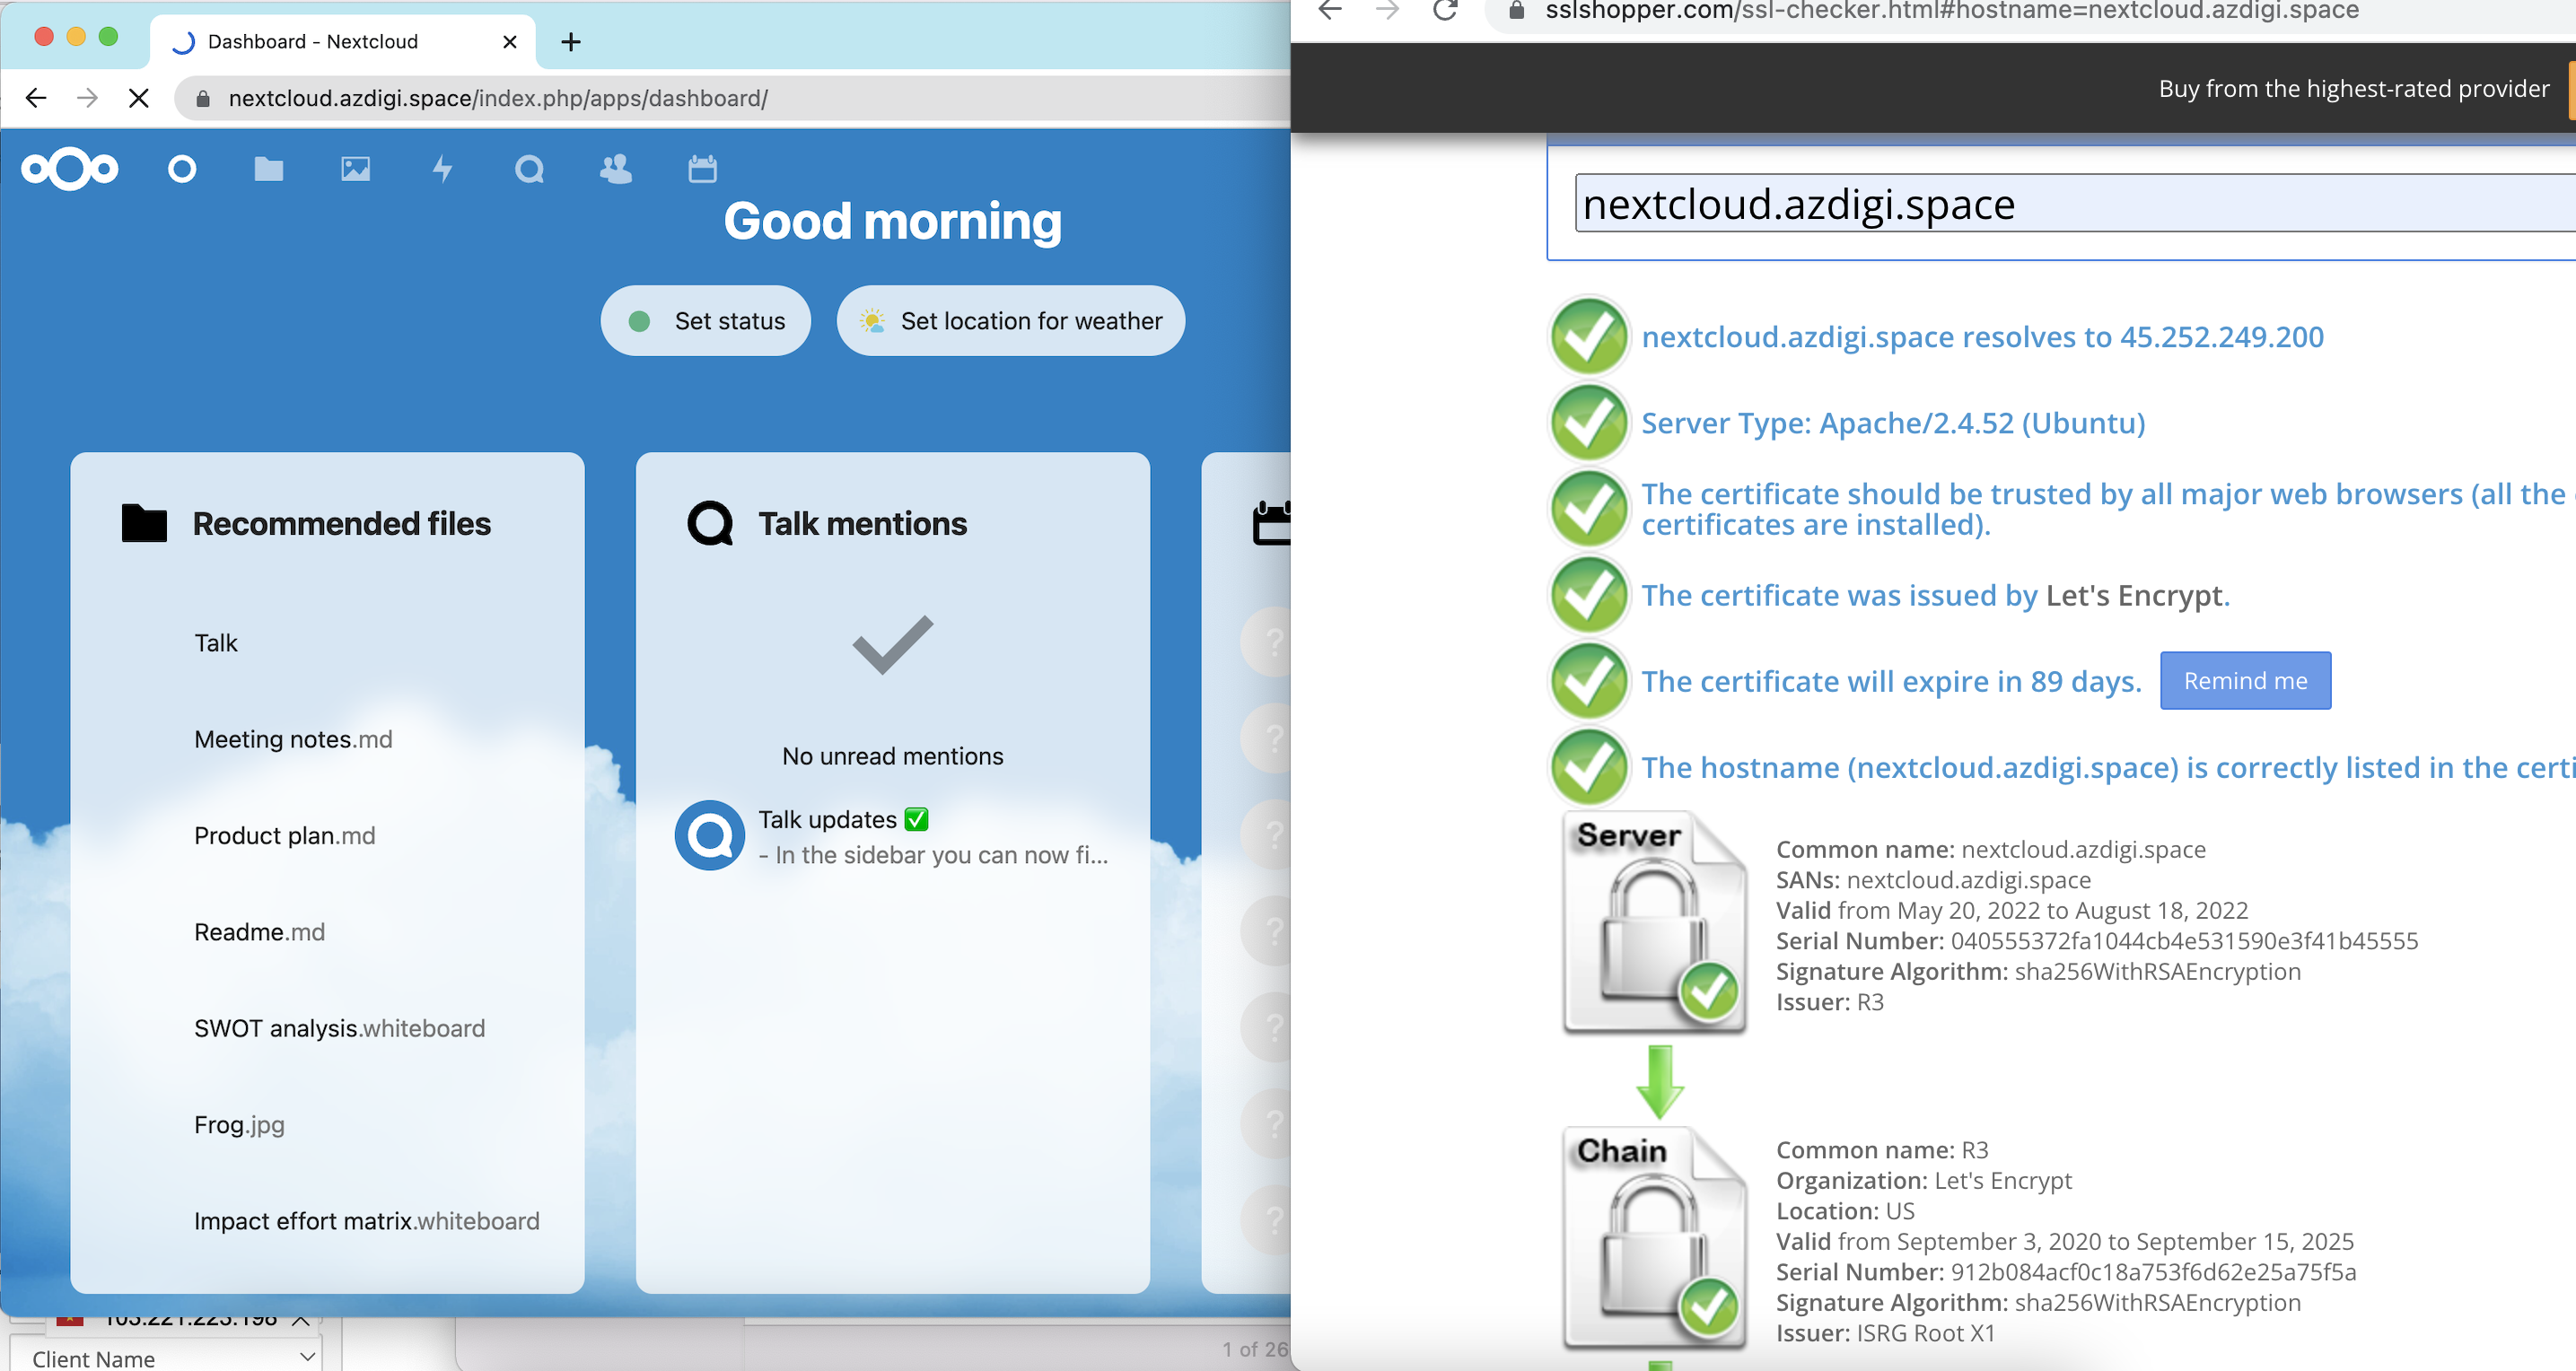
Bước 5: Cài đặt SSL cho Server name
Ở phần cấu hình Virtual Host cho Nextcloud (Bước 3) , thì mình có đặt Server name cho Nextcloud là nextcloud.azdigi.space , nên bây giờ mình sẽ thực hiện cài đặt SSL cho nó bảo mật và nhìn chuyên nghiệp hơn.
- Cài đặt Cerbot Apache
sudo apt install -y certbot python3-certbot-apache
- Cho phép ‘Apache Full’ thông qua tường lửa, để sử dụng cả HTTP & HTTPS
sudo ufw allow 'Apache Full'
- Cài đặt SSL cho Server name
sudo certbot --apache -d nextcloud.azdigi.space
root@ubuntu-2204:~# sudo certbot --apache -d nextcloud.azdigi.space
Saving debug log to /var/log/letsencrypt/letsencrypt.log
Enter email address (used for urgent renewal and security notices)
(Enter 'c' to cancel): kiendt@azdigi.com (Nhập email của bạn)
- - - - - - - - - - - - - - - - - - - - - - - - - - - - - - - - - - - - - - - -
Please read the Terms of Service at
https://letsencrypt.org/documents/LE-SA-v1.2-November-15-2017.pdf. You must
agree in order to register with the ACME server. Do you agree?
- - - - - - - - - - - - - - - - - - - - - - - - - - - - - - - - - - - - - - - -
(Y)es/(N)o: Y (Nhấn y để đồng ý các điều khoản)
- - - - - - - - - - - - - - - - - - - - - - - - - - - - - - - - - - - - - - - -
Would you be willing, once your first certificate is successfully issued, to
share your email address with the Electronic Frontier Foundation, a founding
partner of the Let's Encrypt project and the non-profit organization that
develops Certbot? We'd like to send you email about our work encrypting the web,
EFF news, campaigns, and ways to support digital freedom.
- - - - - - - - - - - - - - - - - - - - - - - - - - - - - - - - - - - - - - - -
(Y)es/(N)o: N (Nhận các thông tin khác từ Let's Encrypt)
Account registered.
Requesting a certificate for nextcloud.azdigi.space
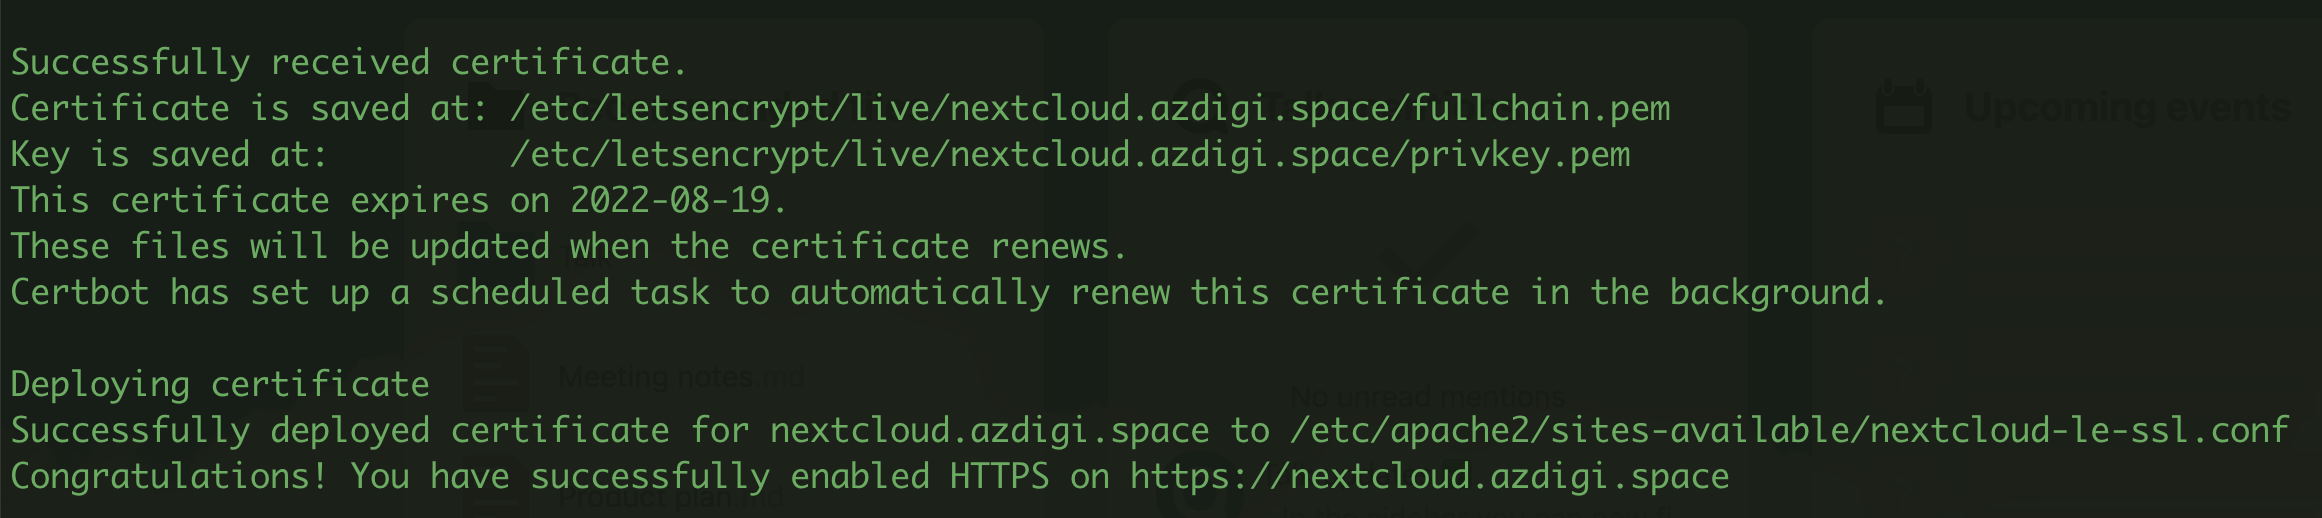
Successfully received certificate.
Certificate is saved at: /etc/letsencrypt/live/nextcloud.azdigi.space/fullchain.pem
Key is saved at: /etc/letsencrypt/live/nextcloud.azdigi.space/privkey.pem
This certificate expires on 2022-08-19.
These files will be updated when the certificate renews.
Certbot has set up a scheduled task to automatically renew this certificate in the background.
Deploying certificate
Successfully deployed certificate for nextcloud.azdigi.space to /etc/apache2/sites-available/nextcloud-le-ssl.conf
Congratulations! You have successfully enabled HTTPS on https://nextcloud.azdigi.space
- - - - - - - - - - - - - - - - - - - - - - - - - - - - - - - - - - - - - - - -
If you like Certbot, please consider supporting our work by:
* Donating to ISRG / Let's Encrypt: https://letsencrypt.org/donate
* Donating to EFF: https://eff.org/donate-le
- - - - - - - - - - - - - - - - - - - - - - - - - - - - - - - - - - - - - - - -
Bước 5: Thiết lập Nextcloud
Sau khi đã cài đặt các dịch vụ cần thiết ở trên. Bây giờ các bạn truy cập
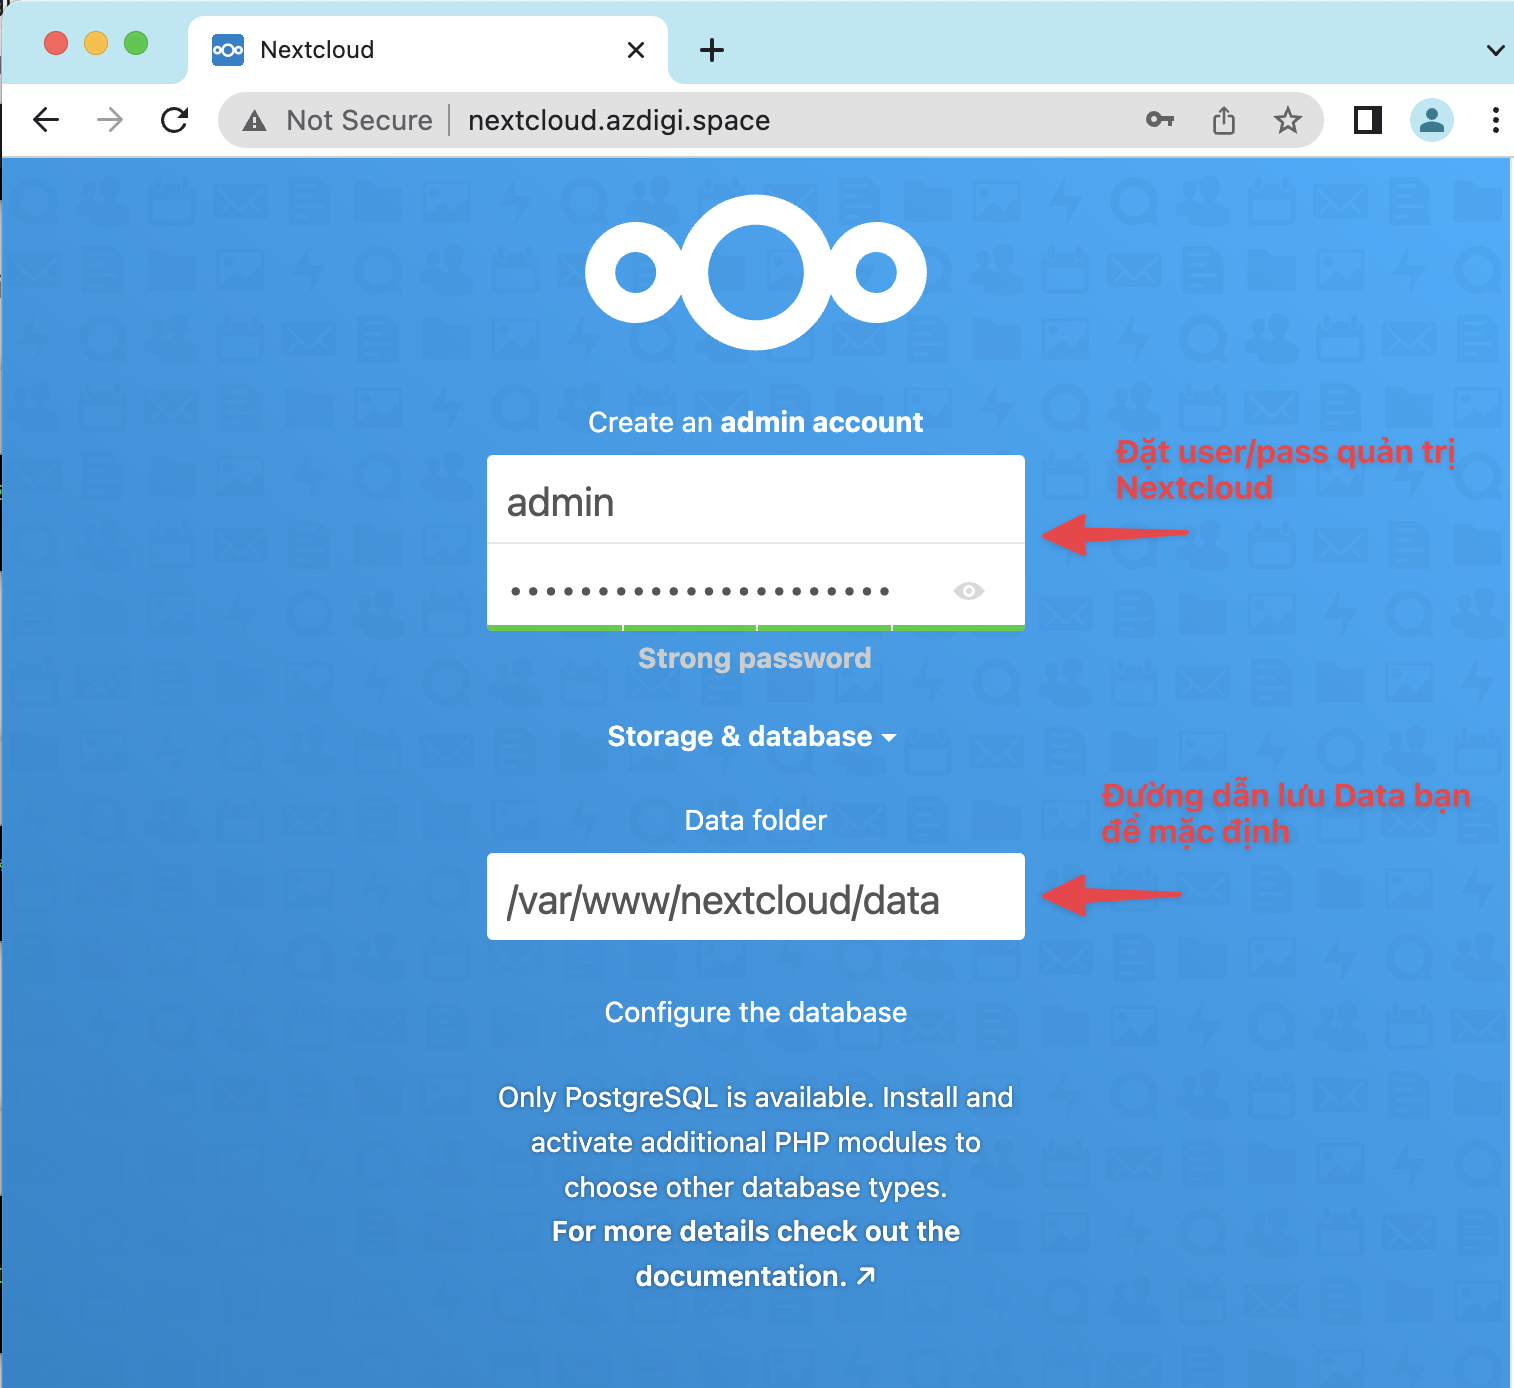
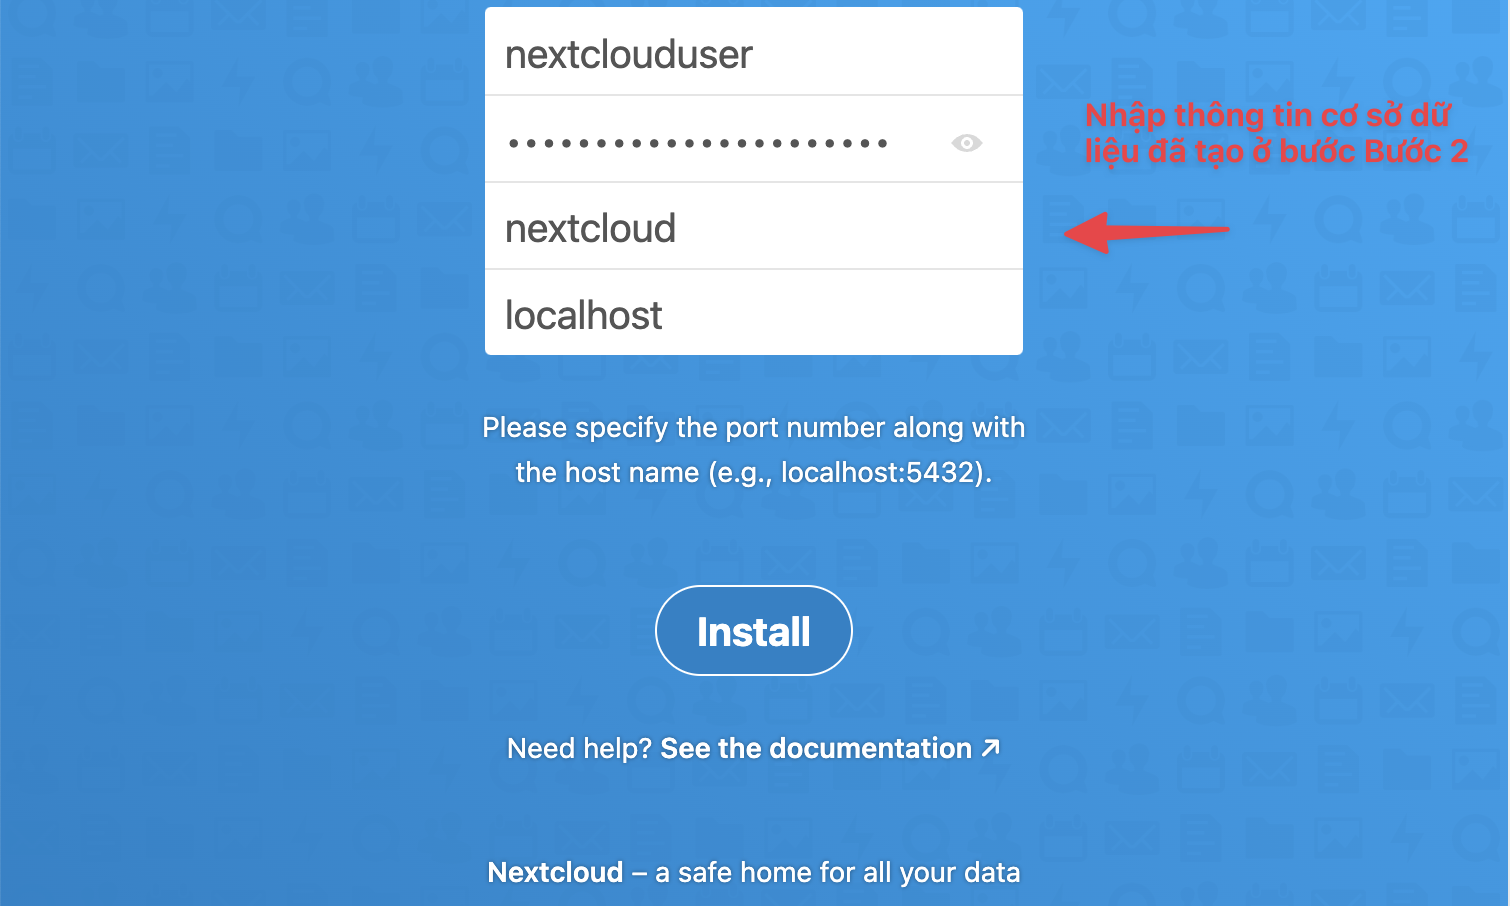
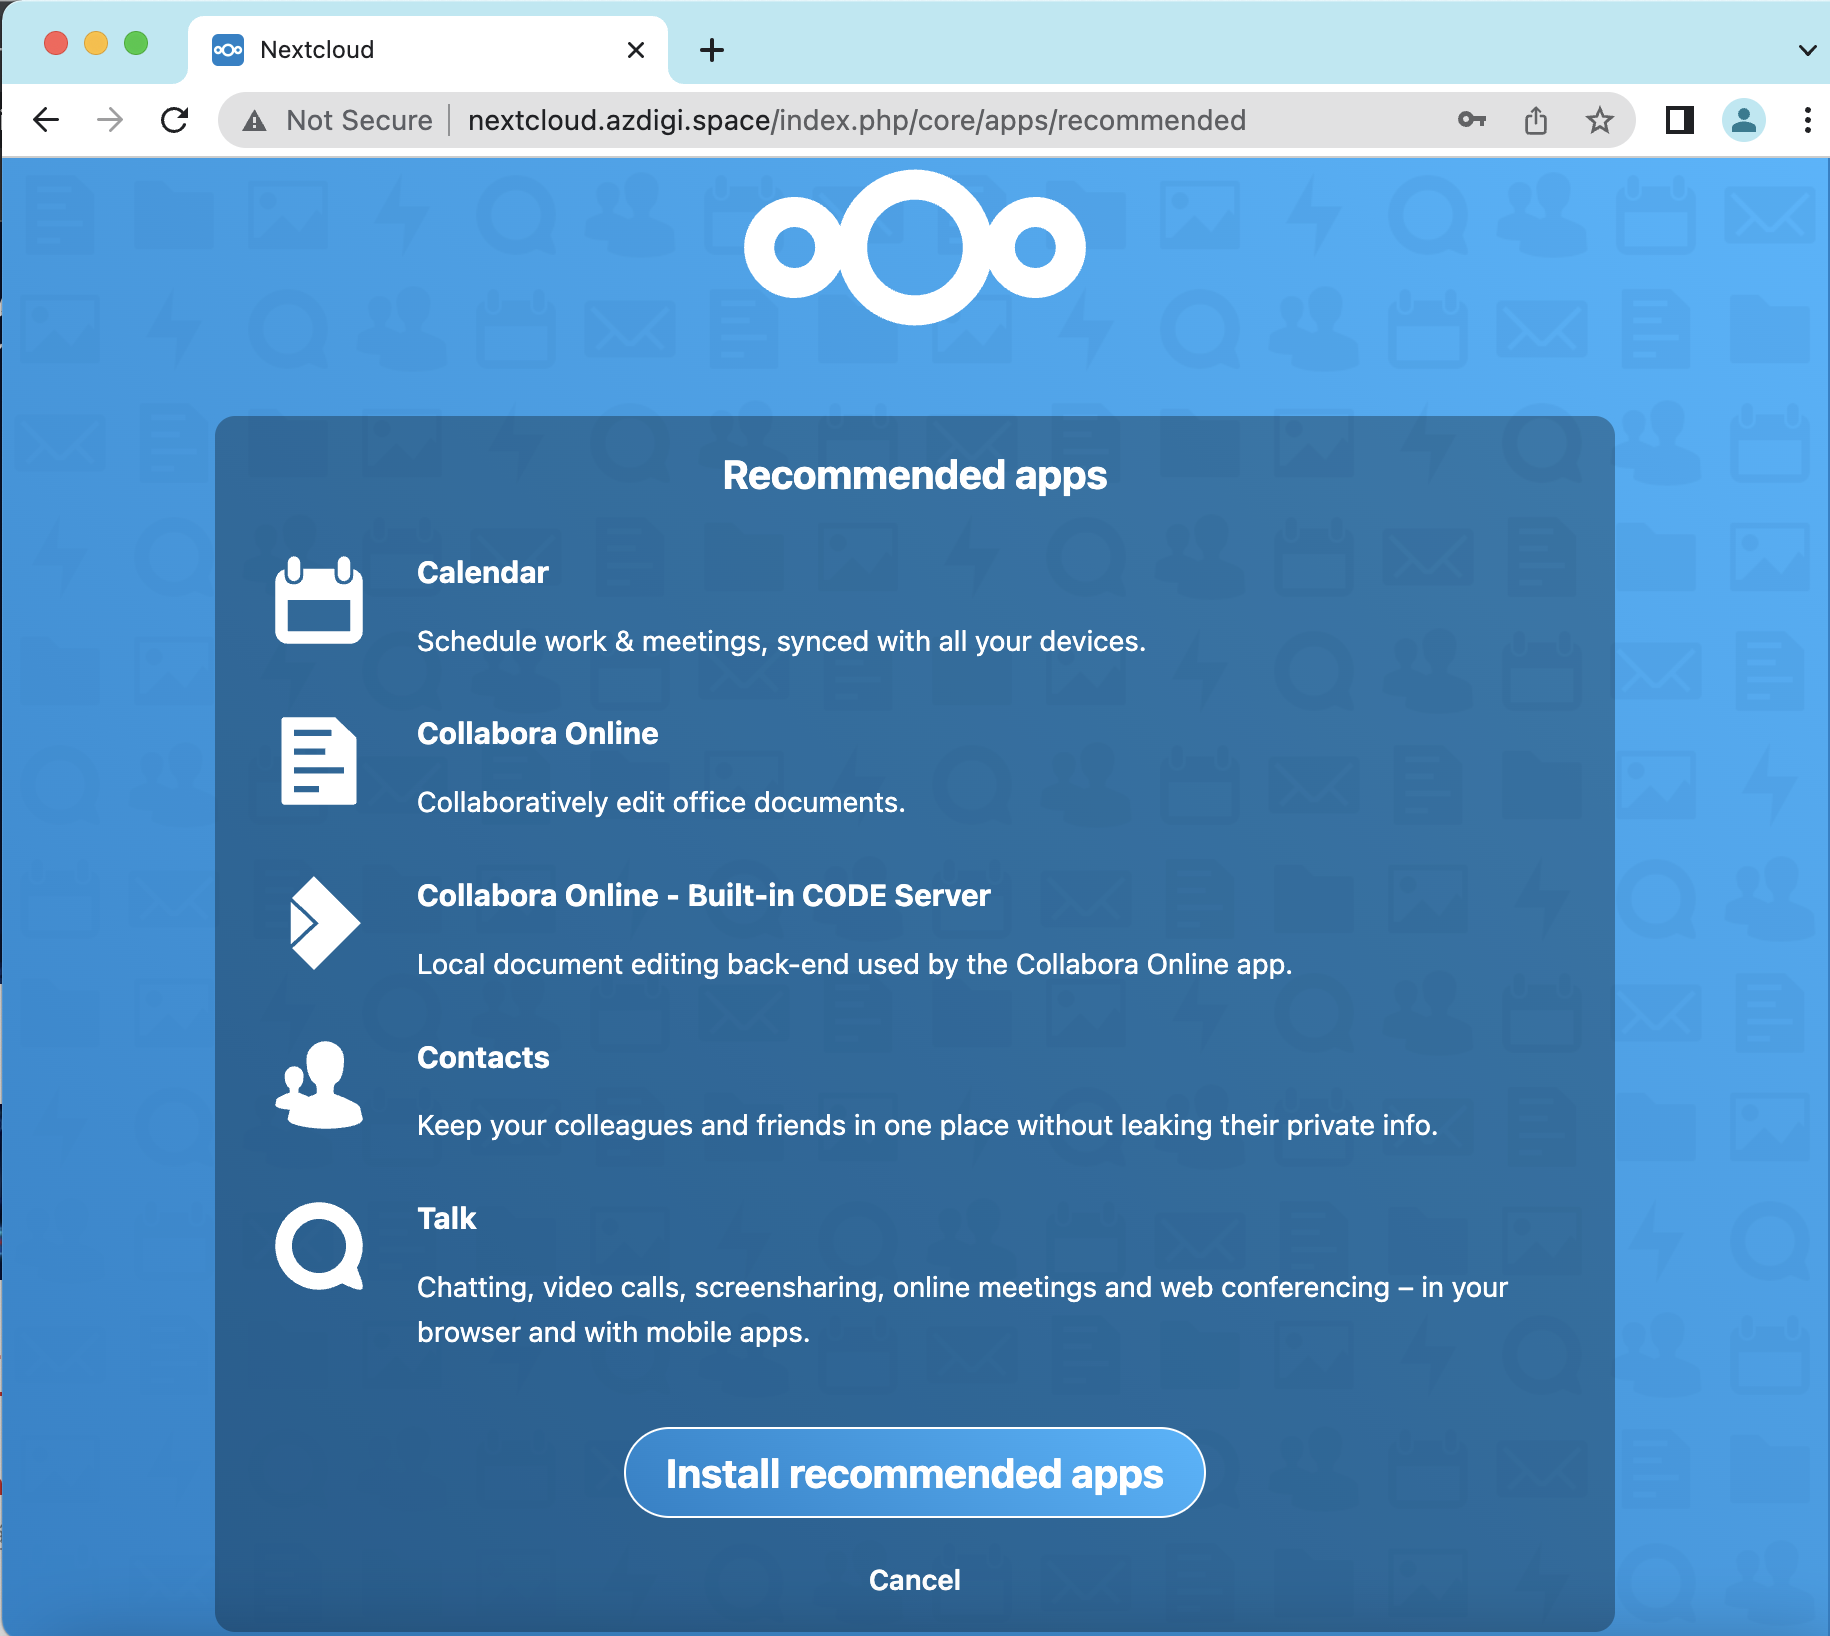
Khi cài đặt hoàn tất, giao diện Nextcloud sẽ hiển thị như bên dưới. Đến phần này thì bạn đã cài đặt xong Nextcloud rồi nhé.
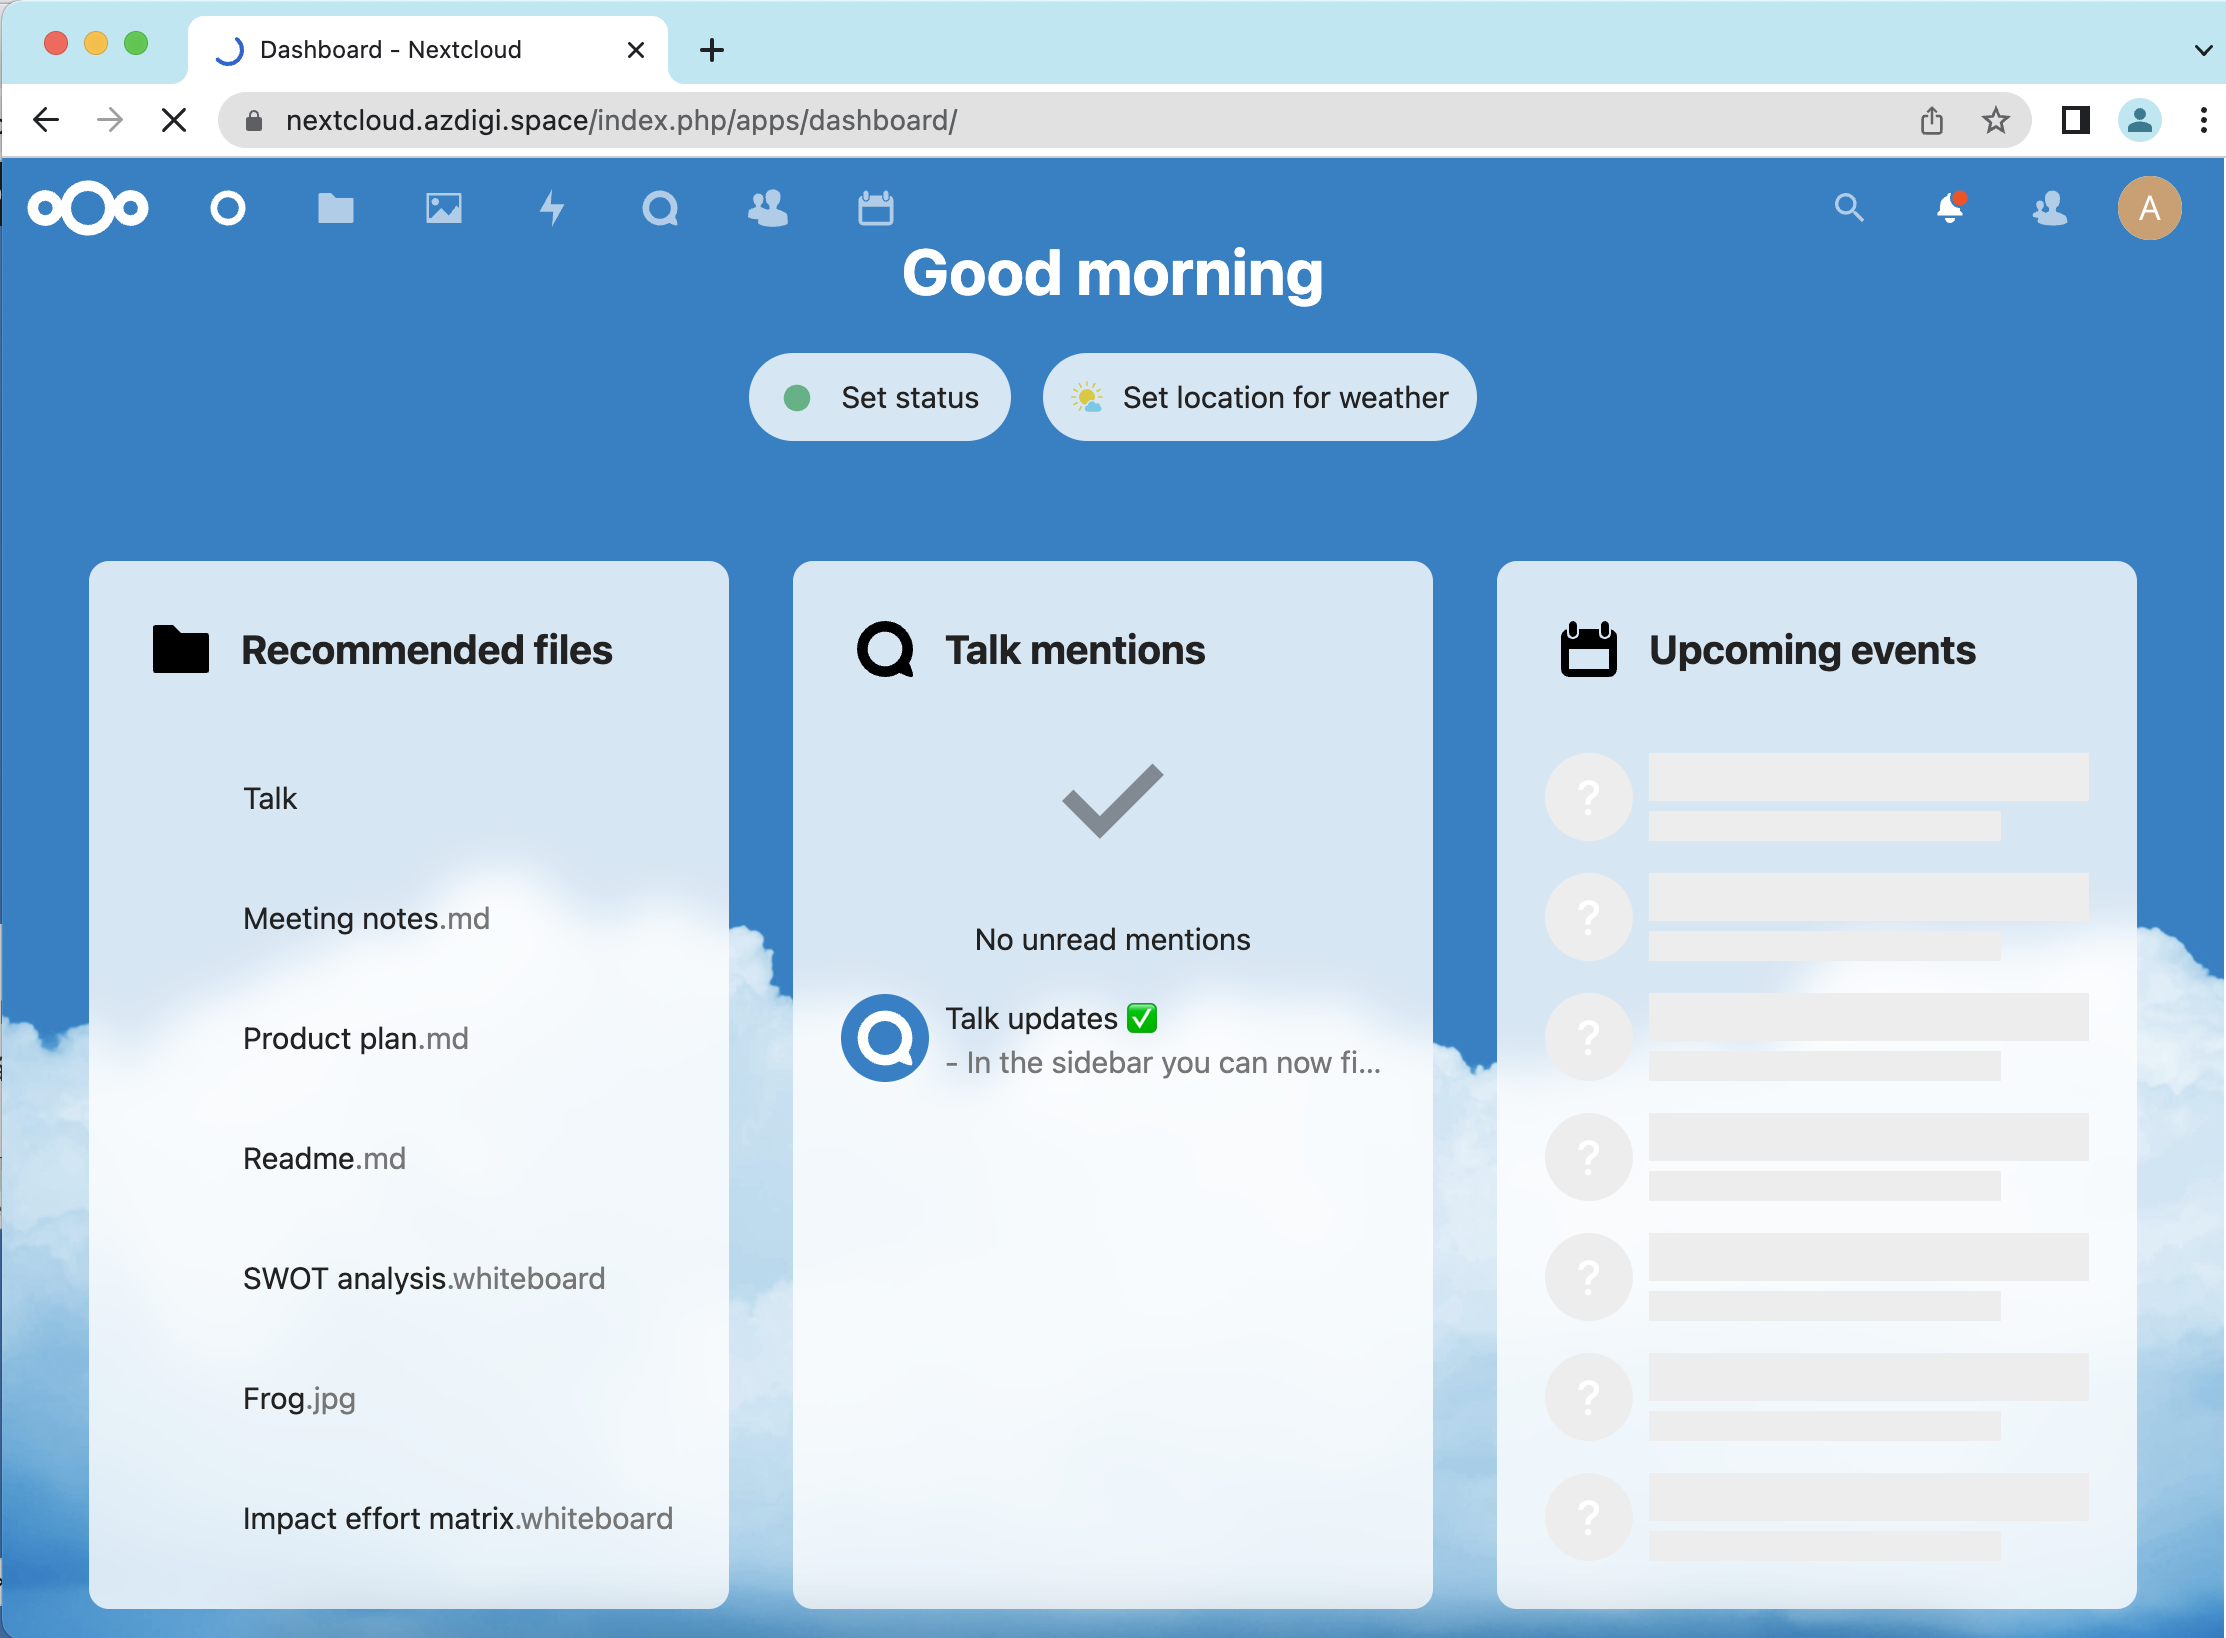
Chúc bạn thực hiện thành công.
Các bạn có thể tham khảo thêm các hướng dẫn sử dụng khác tại link bên dưới
Nếu các bạn cần hỗ trợ các bạn có thể liên hệ bộ phận hỗ trợ theo các cách bên dưới:
- Hotline 247: 028 730 24768 (Ext 0)
- Ticket/Email: Bạn dùng email đăng ký dịch vụ gửi trực tiếp về: support@azdigi.com
Author Bio